Baby Food Jar Jack-O-Lanterns

I love a good craft project! Especially a seasonal one. It’s just that I don’t always have the time to complete one. I also don’t have the space available to lay out a huge project and leave it laying out as I work on the project at a leisurely pace. However, these baby food jar Jack-O-Lanterns are the perfect craft for me! They are quick to make, require very few supplies and don’t take up a lot of space.
Baby Food Jars
I just love baby food jars. They are so tiny and cute! I kept more than my fair share of them when my kids were eating baby food a few years back. I knew they were just asking to be made into a craft. Maybe I didn’t know what kind or when, but I knew there was a project in there! I had seen this idea on Pinterest done in a several different ways, so I decided to give it a try and make my own version of baby food jar jack-o-lanterns!
This post contains affiliate links. If you purchase something from those links, I may make a small commission. See our full Disclosure and Disclaimer Policy here.
Let’s Get To It!
Supplies Needed
- Babyfood Jars – (or crafty jars) Washed, dried and labels removed
- Orange craft paint
- Clear Printable Labels – The download to print is below!
Additional Supplies
- Printer – To Print the labels for the jars
- Goo Gone – to remove the original baby food brand labeling on the jar
How to Make Baby Food Jar Jack-O-Lanterns
We’ve got all our supplies assembled! Now we are ready!

Step 1: Clean Jars
First, you need to make sure your jars are clean and dry. Remove the labels and the sticky residue from the labels. I used Goo Gone for the label removal part and then washed the jars in warm soapy dishwater. I let them dry while I got everything else ready.
If you don’t have a baby around that’s eating baby food, there are any kind of jars you could ever want at most craft stores or online here.
Step 2: Paint the Jars
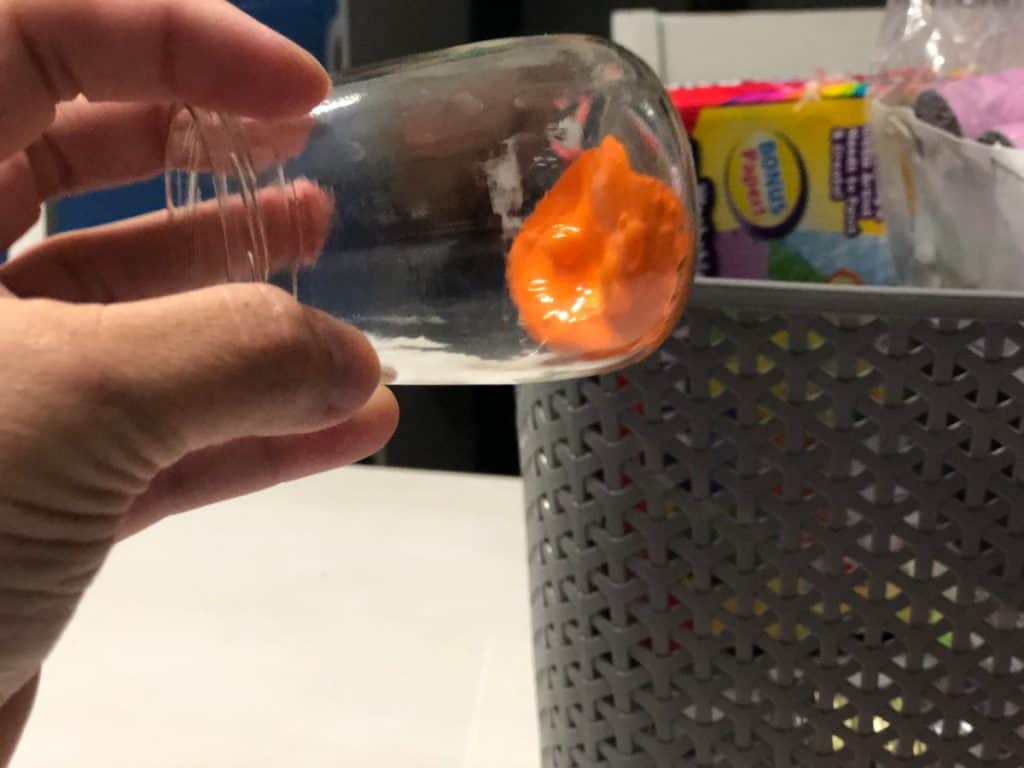
This is crazy easy and not at all messy. My kind of painting! All you do is squeeze or pour a few tablespoons worth of paint into the baby food jar.

Step 3: Roll the Paint Around Inside The Jar
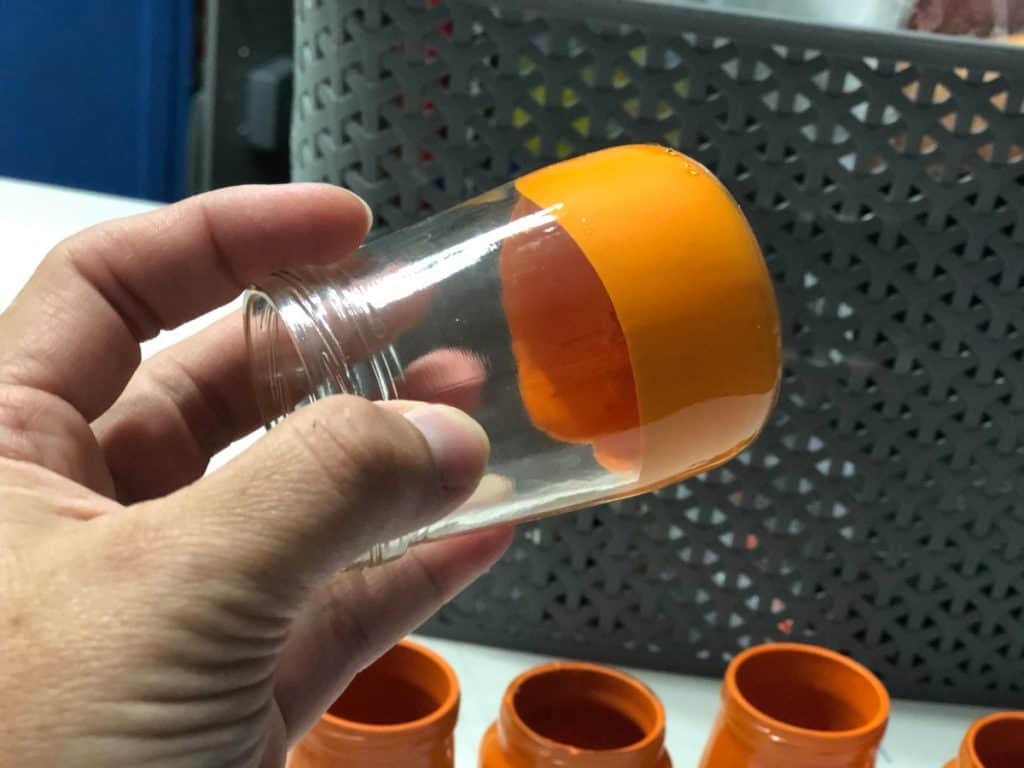
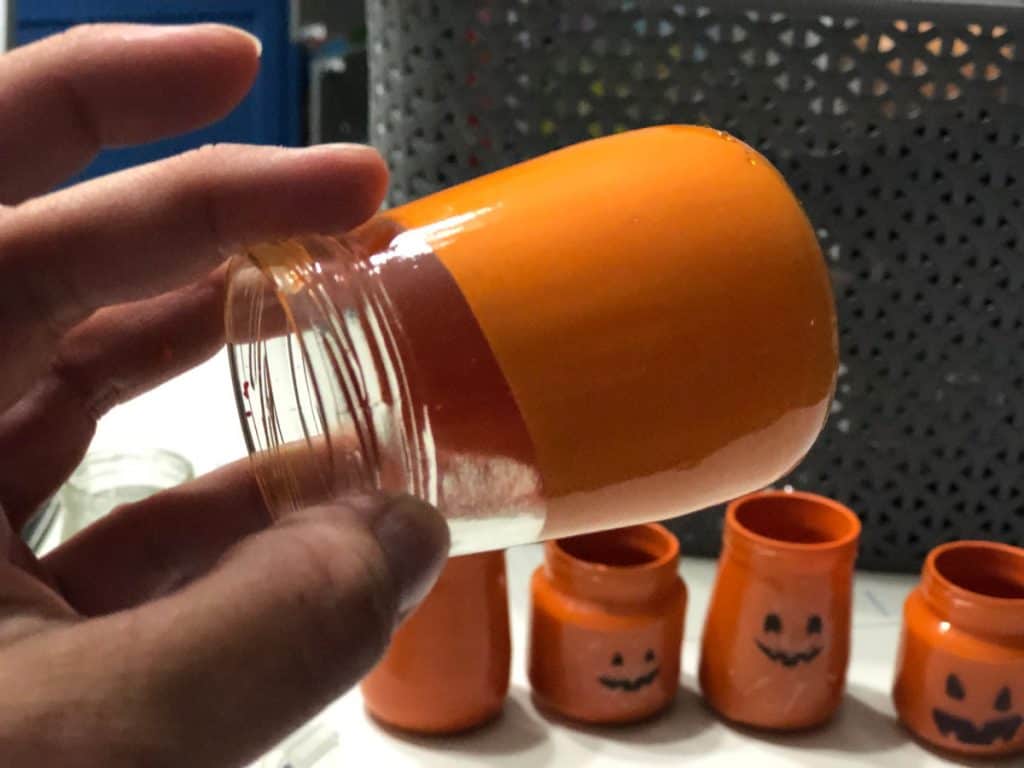
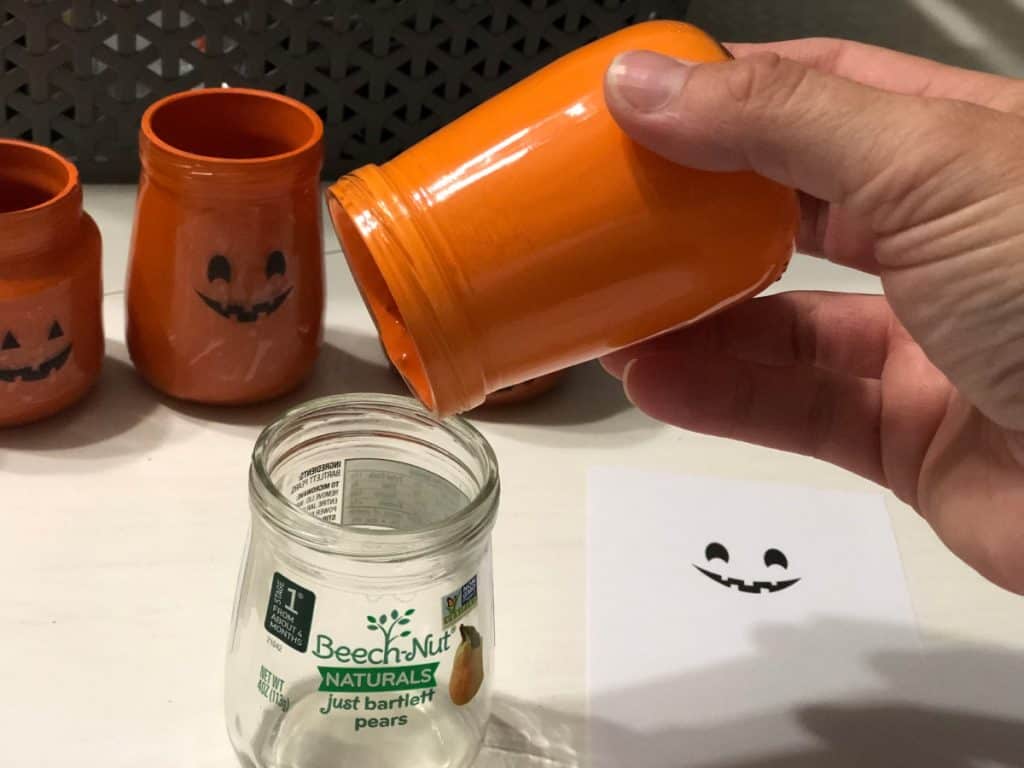
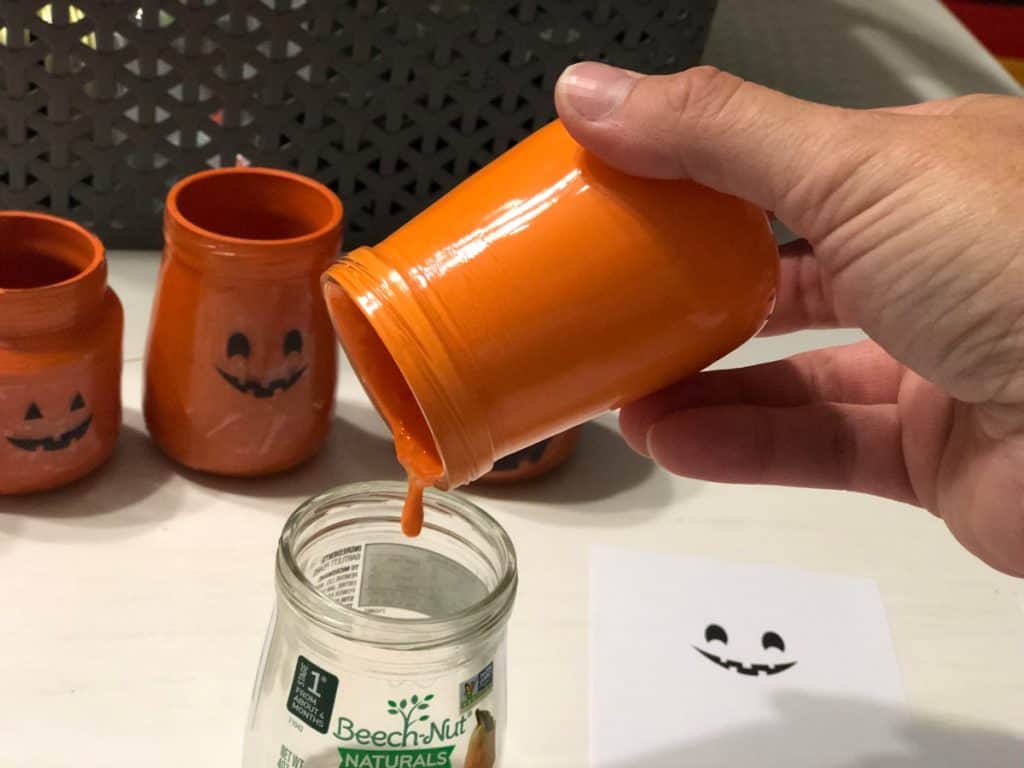
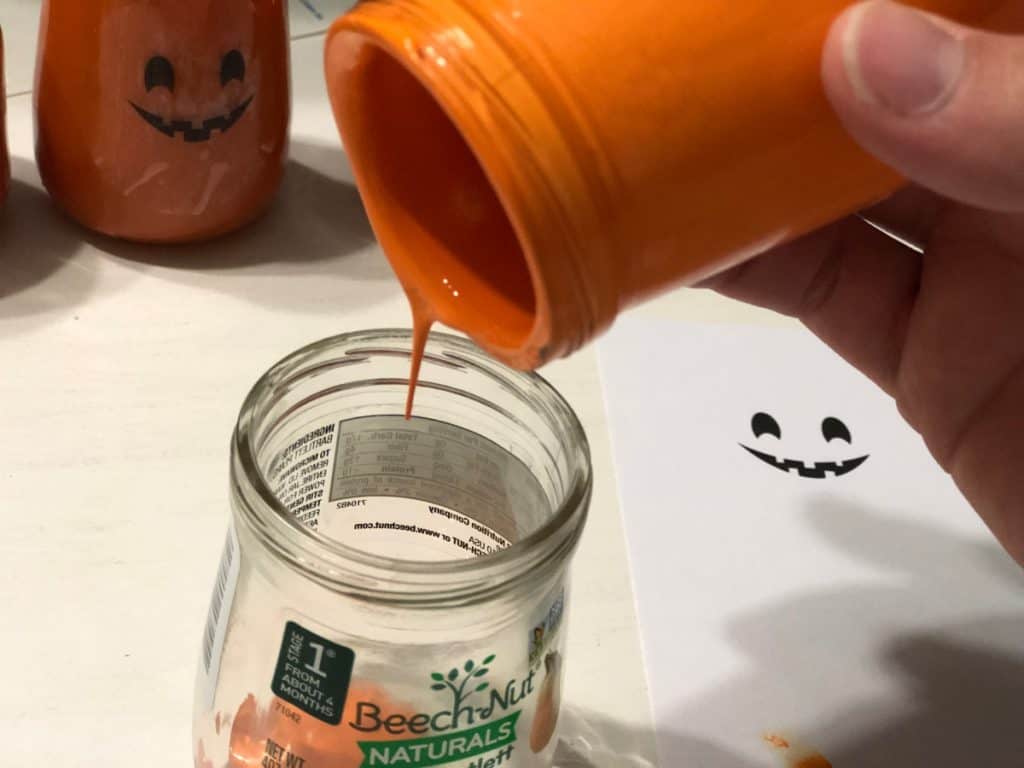
Gently lean the jar towards it sides and gently roll the jar around in your hands until the inside of the jar is totally covered with orange paint, all the way to the top of the jar, including the rim.
Step 4: Drain Extra Paint
If you have extra paint in your jar, simply let that paint drip into your next jar you are going to paint. If you are done painting jars, you could just let it drip back into the bottle of paint or into a scrap jar.
Step 5: Print Your Labels
While your jars are drying, go ahead and print out the labels for your jars. I’ve used Avery Labels Size 22825 and the template I created can be downloaded for printing here:

Side Note:
If you prefer, there are a lot of other ways to get the faces on the jars. I don’t have a steady enough hand, but if you do, you could easily paint them on the jar or even use a Sharpie marker to draw them on the jar. Some people enjoy cutting out vinyl with a Cricut cutting machine, and that would totally work too. I just found printing labels to be the easiest and certainly the quickest solution for me!
Step 6: Stick Labels on Jars
Once you have the labels printed, all that’s left to do is stick the labels on the jars! A word of warning for you though! I had a lot of trouble with these large round labels lying flat and smooth on the jar. Partly because the labels were big compared to the jar, and partly because the particular jars I was using (BeechNut Brand) are more pear shaped with a smaller top of the jar and bigger bottom of the jar.
The solution to this problem is actually a crazy easy fix. Just cut out the amount of label you need right around the face of the jack-o-lantern. Don’t try to stick the entire round label onto the jar. Trust me, it was an exercise in frustration!
Step 7: Admire Your Work
These jars turned out even cuter than I had hoped they would. I just love them. Look how cute!

I put a label with a different face on each side of the jar so I can change it up and decide that day which kind of face I want to see. The kids loved changing them around as well!
What Do You Do With Them?
So, now you have them, what do you do with them?
I like to put a flameless candle inside and let them sit out and light them up when it gets dark. I will put mine on the mantel with the other Halloween decorations and light them in the evenings. But you could put them anywhere you want a little Halloween cheer! You could also put some candy in a baggy inside and deliver it to others as a gift and a decoration for the fall season!
Baby Food Jar Jack-O-Lanterns Wrap Up
These jars turned out to be such a fun and EASY craft. I am not known for my abilities to begin and FINISH a craft project sometimes. But this little project is so quick and easy, it can be completed in an hour, minus the drying time for the paint. And even that doesn’t slow you down progressing with the project! These baby food jar Jack-O-Lanterns were right up my alley. And the turned out to be so cute! I’m going to use them for decorations and also for gift giving for some loved ones and teachers. I hope you give this project a try! If you do, send me pictures of your jack-o-lanterns! I’d love to see how yours turn out!
Until then, just keep shuffling!
Supplies for Baby Food Jar Jack-O-Lanterns:
- Clear Jars (leftover baby food jars or others!)
- Orange Paint
- Clear Printable Labels
- Inkjet Printer
- Goo Gone (for removing jar labels)
- Sharpie Markers (alternate jack-o-lantern face)
- Black Vinyl (alternate jack-o-lantern face)
- Cricut Cutting Machine
- Flameless Tea Light Candles
Baby Food Jar Jack-O-Lanterns

Baby food jar Jack-O-Lanterns are such a cute addition to your home for the Halloween and fall season! This fun and easy Halloween craft makes a perfect addition to any fall decor! This project is quick and simple to complete and will brighten up your decorations for years to come!
Materials
- Baby food jars (used) - cleaned and labels removed
- Orange craft paint
- Clear adhesive labels
Instructions
- Start with clean, dry jars with labels removed.
- Paint the Jars - For this step, simply squeeze around 2-3 tablespoons of the orange paint into the car.
- Angle the jar towards it sides and gently roll the jar around in your hands until the inside of the jar is totally covered with orange paint, all the way to the top of the jar, including the rim.
- If you have extra paint in your jar, simply let that paint drip into your next jar you are going to paint. If you are done painting jars, you could just let it drip back into the bottle of paint.
- While your jars are drying, go ahead and print out the labels for your jars. The file can be found here.
- Once you have your labels printed, all that's left is to stick them on the outside of the jar. ***NOTE: My baby food jars are bigger on the bottom and smaller on the top. (I.e. - BeechNut brand is more of a "pear" shaped jar) so I found that my label crinkled up and would not lay flat on the jar without creating creases or bubbles. So, I simply cut it to be a smaller label and just cut it into a square shape around the actual face on the label, and it stuck on smoothly and perfectly!
Notes
***NOTE: My baby food jars are bigger on the bottom and smaller on the top. (I.e. - BeechNut brand is more of a "pear" shaped jar) so I found that my label would crinkle up and would not lay flat on the jar without creating creases and bubbles. So, I simply cut it to be a smaller label and just cut it into a square shape around the actual face on the label, and it stuck on smoothly and perfectly!
Recommended Products
As an Amazon Associate and member of other affiliate programs, I earn from qualifying purchases.
-
 Goo Gone Original - 2 Ounce - Surface Safe Adhesive Remover Safely Removes Stickers Labels Decals Residue Tape Chewing Gum Grease Tar
 -
 Apple Barrel Gloss Acrylic Paint in Assorted Colors (8 oz), 20748 Gloss Pumpkin Orange
 -
 Avery 2" Round Labels for Laser & Inkjet Printers, 120 Glossy Crystal Clear Labels (22825)
Related Posts:
- Fall Day Date Ideas
- Spring Monogram Wreath
- 6 Things To Do Immediately When You Are Having The Worst Week Ever
Want to remember this? Save this article about “Baby Food Jar Jack-O-Lanterns” to your favorite Pinterest board!